
It’s often said among boaters that cruising is “fixing your boat in exotic places”. At times, it certainly feels that way. In August, while we were in Sint Maarten, we “hauled out” for 16 days to get a number of boat projects done, and this is the report of that haul out, and of the several other projects we’ve completed since then. My standard warning for all posts like this is that they’re probably not very interesting to many of you, and you won’t offend me by not reading them. (The original “Work, Work, Work” post, from early 2018, is here.)
This is approximately in the order in which we did these projects.
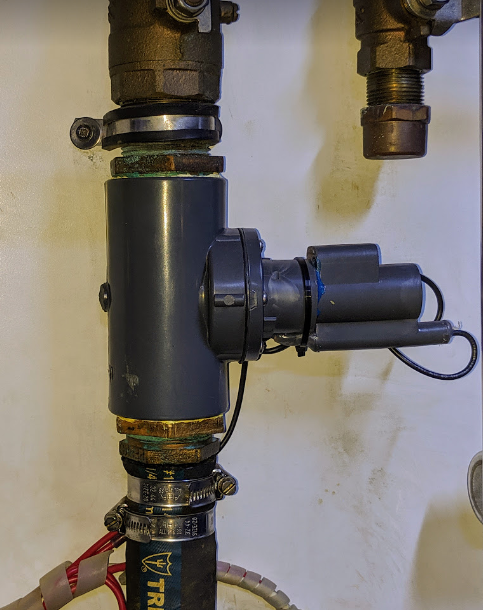
Replace Raw Water Flow Sensor
Boat engines are typically cooled with the water in which they’re floating, referred to as “raw water”. It’s pumped in through a hole in the hull of the boat (cleverly called a “through hull”), through one or more heat exchangers, and then is typically pumped out into the engine’s exhaust pipe, which not only gets rid of the water, but also cools the exhaust pipe. (The radiator on your car is a heat exchanger that uses air to cool the antifreeze. On a boat, the raw water is used to cool the antifreeze instead of air.) Smartini has two raw water flow sensors, each connected to an alarm system, so that if there isn’t enough raw water flowing through the cooling system, an alarm goes off. One of the sensors was stuck in the ON position, making the alarm sound constantly, so I replaced it with a new one.

Remove, Inspect, Replace Hull Zincs
When two different metals are submerged in an electolyte, there’s an electric reaction that causes small amounts of voltage to flow from one metal to the other. This is how a typical car starting battery works – lead and lead dioxide plates are submerged in hydrochloric acid. A metal boat, with a lot of different kinds of metal (steel, bronze, stainless steel, maybe some others) exposed to seawater (an electrolyte), creates the same kind of reaction. In all such reactions, the “least noble” metal is slowly eaten away by the reaction. Since you don’t want any part of your boat to be eaten away, you fasten big blocks of zinc (or in some cases, aluminum) to the metal of the hull, and you allow the reaction to consume the zincs. This should happen slowly (a set of zincs typically lasts at least a year), and periodically you simply replace the zincs. This can be done while in the water (a not-so-fun scuba dive), but it’s obviously a lot easier to do while the boat is out of the water. So we did. All eight of our zincs were still in good enough condition to continue to use, but they had to be removed (two nuts each) for the new bottom paint to be applied, then reattached.
Replace Blackwater Dump Hose
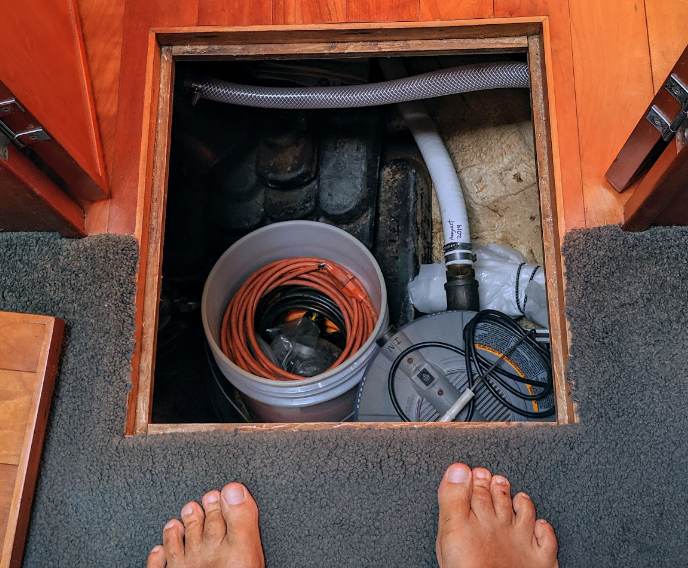
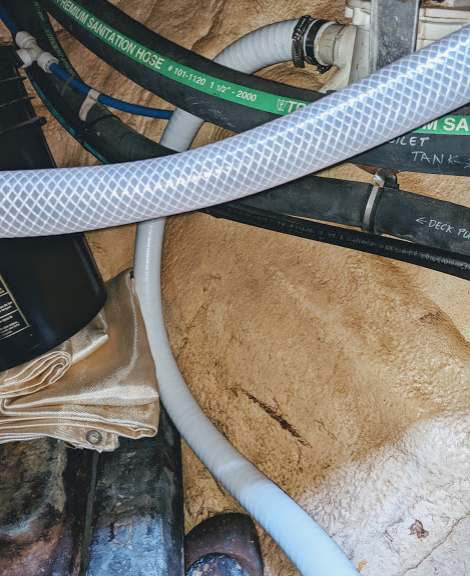
(Trigger warning – this item deals with the least pleasant aspect of living on a boat.) When you flush a toilet on a boat, where does it go? On some boats, it can go directly overboard, or go into a holding tank. (It SHOULD only ever go overboard when the boat is in deep water.) On Smartini, it always goes into the holding tank, called the blackwater tank, or simply, the poop tank. (Sorry!) Eventually, the tank gets full and has to be emptied. Most boats, including ours, have two options for this: it can be pumped out, typically at a marina, where it goes into the city sewer system. Or you can dump it overboard, if you’re far enough from land and in deep water. We haven’t encountered a pump-out station since we left Florida, which means that, whenever we’re moving from one place to another, we get far enough offshore and in deep water, and activate the dump pump. This empties the tank through a big rubber hose that goes to a through hull. That hose was the original, installed when the boat was built in 2002, and over time, they can start to give off an unpleasant odor. So I replaced it. That is, I crawled down into one of the three worst places on the boat to do anything, and I contorted myself to get to the ends of the hose to loosen the hose clamps, and removed it, and contorted myself some more to reverse the process with the new hose.
Repair Some Paint Issues and Buff the Hull
Like a car (or maybe more like a farm implement), boats tend to get the occasional scratch in the paint, or worse. (It mostly depends on your docking skills, at which Fran excels, but sometimes it’s beyond your control.) Also, when we had our Hurricane Irma damage repaired in early 2018, the painters did a horrible job of matching the color, so we had several small areas, and one giant area, where the paint didn’t match. As soon as the boat was hauled out, we were approached by one of the guys in the boatyard who paints boats, saying “I can make that look as good as new.” We weren’t even planning on having this done, but who doesn’t want their home to look nice? So over the 16-day duration of the haul out, Noel and Crew fixed dings and scratches, repainted the mismatched areas, then buffed the entire hull. When they were done, it did, in fact, look as good as new! (And we had blown our budget for the haul out by several thousand dollars. Oh, well.) Strangely, we didn’t take a picture of the end result.
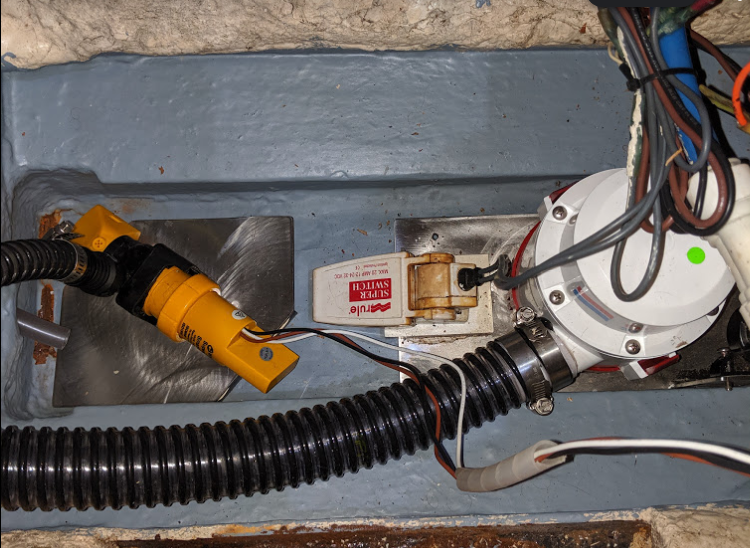
Update the Bilge Pumps
The bilge is the lowest part of the inside of a boat, and that’s where any water that gets into the boat goes. Smartini has two such areas, one under the junction between the transmission and the propeller shaft (because there is always a little bit of water that drips in around the shaft seal), and one forward, under the floor in the master cabin. When we bought the boat, each of these bilge areas had a single high capacity bilge pump in it, activated by a float switch that would switch on only if there was about 3″ of water in the bilge. However, these two pumps were not the same size. For reasons too numerous to mention here, I wanted two pumps in each area – a small one that would start pumping with only about 1/2″ of water, and a big one that should never come on, but if it did, it would be capable of moving a lot of water in a hurry. And I wanted the two big pumps to be the same model of pump, so that I had to have only one spare. We got this done, but it involved a lot of steps:
– Remove the existing forward pump and the hose that ran under the floorboards 22 feet to where it dumps overboard.
– Clean (to bare metal) all rusty spots in that bilge area, then apply two coats of epoxy paint.
– Install the new big pump (same size as the aft big pump), and the 22 feet of larger hose that it required.
– Install the new small forward pump, including the wiring and switches, which are inside a nearby cabinet for easy access, and the 22 feet of hose.
– Reroute the aft big pump’s hose to shorten it by about 5 feet (that improves the performance of the pump).
– I had installed the aft small pump several months ago, but I did reroute its hose as part of this project.
Now, both bilge areas have two pumps, with a total combined (theoretical) capacity of 9,500 gallons per hour. Seems like a lot, right? But a 2″ diameter hole in the boat, four feet below the waterline, would let in more water than these four pumps could keep up with. It’s nice having a steel boat!
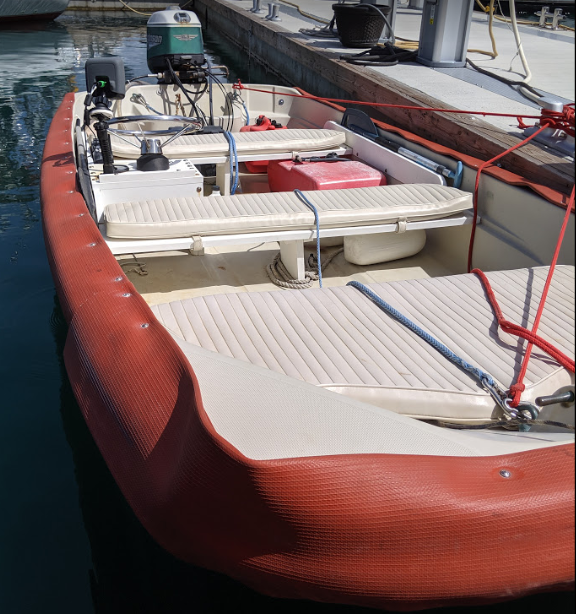
Waterproof All Exterior Cushions
There are eleven cushions on Smartini’s exterior – seat backs and bottoms – made of Sunbrella, a brand of canvas used for boats and awnings. Once a year, they have to be cleaned and re-waterproofed, by spraying the waterproofing solution on them and letting them dry. You can’t do this on the boat because it’s so messy, and the boatyard is so dusty. We removed all of them, shoved as many as would fit into our rented Hyundai i10 (a miserable little car by almost any measure), and took them to the airbnb where we were staying, so “we” (Fran) could clean and treat them on the patio. Repeat until all of them are done (three or four round trips in all).
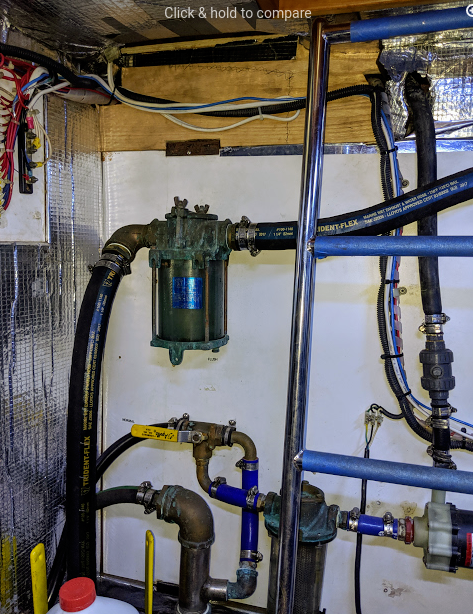
Chemical Flush of All Heat Exchangers
Because the heat exchangers have seawater flowing through them, they will, over time, get some buildup of various forms of tiny marine life inside them. Some is like the scale you get in your home plumbing due to hard water, but in some waters, you actually get barnacles growing inside the heat exchangers. As you might imagine, this is not good for the flow of water, and drastically reduces the cooling effectiveness of the system. So periodically (annually, or thereabouts) you should flush them out with a product like Barnacle Buster, which is a mild acid solution that dissolves calcium deposits. The process of getting this into the system is too complicated to describe here, but I started pumping the solution in, and long after I thought the system should be full, it wasn’t. Well DUH!!! I had missed one step in the process, and all my Barnacle Buster was now in the aft bilge! (Thankfully, the pump didn’t come on because I had it switched off, because of the aforementioned work I was doing on the pumps.) Long story short, I pumped it back into the bucket, had to clean everything in the bilge that had been soaking in a mild acid solution for 30 minutes, ran it back into the system, let is sit overnight, then pumped it back into the bucket… only to find that it was barely dirty. Fearing that I had diluted it too much, I bought some more Barnacle Buster and repeated the whole process (completing ALL the steps this time), to find that it was still barely dirty. In other words, all that work, twice, when it didn’t even need to be done. Oh, well.
Chemical Flush of the Air Conditioning System
Smartini has three air conditioning units – one for the salon (living room), one for the galley (kitchen), and one that cools both cabins (bedrooms). They, too, are cooled by raw water pumping through them, so they, too, get a periodic Barnacle Buster bath. Some time ago, I added plumbing to the A/C cooling system that makes it easy to do this, so I mixed up some more Barnacle Buster and did it. Same result – almost no crud came out. Conclusion: the waters in which we’ve been operating in for the last year don’t have a lot of the type of marine life that clogs up boat cooling systems. Yay! (Based on this conclusion, I opted to not flush the generator’s heat exchanger, saving me a couple of hours.)
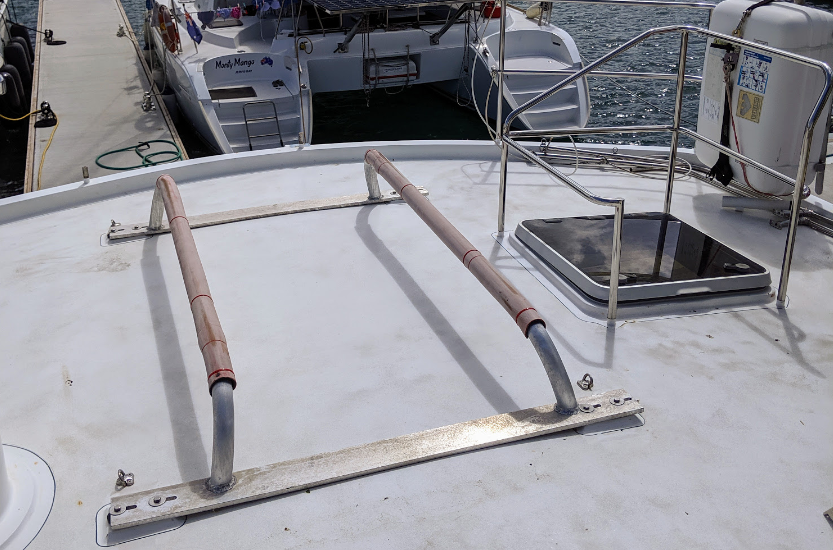
Inspect All Anchor Chain, Add Yarn Markeres, Clean Chain Locker
Smartini has 200 feet of stainless steel anchor chain, then 100 feet of heavy rope, for a total rode length of 300 feet. (Nautical trivia: whatever connects the anchor to the boat, be it chain, rope, or both, is, collectively, called “rode”. I have no idea why.) We lowered the anchor and chain to the ground, inspected it all (no problems), and replaced the colored yarn markers at 25 feet intervals – you need to know how much rode you’ve let out when anchoring. There are a lot of different ways of marking anchor chain – paint, zip ties, little plastic thingies you can buy specifically for the purpose – but we’ve found that three or four pieces of different colored 100% polyester yarn, tied onto the chain, makes a very visible marker that stays on the chain a surprisingly long time. While the chain was out, we inspected the chain locker (also known as The Pit of Despair, because it’s the worst place to have to do work on the boat, and we’ve both done it for lots and lots of hours) for chipped paint, rust, etc. and found none. Yay! And then, we had to get all that chain back into the locker. By hand. (“Workout of the Day: hoist 200 feet of 3/8″ stainless steel chain 20 feet off the ground, for time.”)
Re-Caulk Six of the Twelve Side Windows
At some point in Smartini’s past, some of the windows had been re-caulked, which we know because the caulking around some of them was in perfect condition, and around the others, it was not – to the point of allowing water to get under it, and start to cause small rust spots. Chris from Custom Fit spent a day removing the bulk of the caulk on the bad windows, and then Fran and I spent a full day getting ALL the caulk out, because that’s what Noel (paint guy) said we needed to do to prevent rust from returning. Imagine using a razor blade, a small screwdriver, and some sandpaper wrapped around a paint stir stick to scrape out heavy rubber caulking around six windows, each of which is approximately 2 1/2 feet x 2 1/2 feet. You have to get into a trance, almost, and focus on the next three inch section. But we got it all out. Then we got the Dremel tool out to eliminate every bit of rust on all the little spots. Then we put a rust treatment on all the little spots. Then Noel and Crew painted all around the windows. Finally, Arno from Custom Fit applied the new caulk. It was a real PITA of a job, but it was worth it – all the windows now look great, and should be rust free indefinitely. Yay!
Attempt Repair of Killer’s Tilt/Trim System
The outboard motor on Killer (our 13′ Boston Whaler dinghy) is big enough that it has an electric tilt/trim system for raising and lowering it. We’ve had problems with it for the last year or more, and it finally stopped working altogether. I could write a whole post on my efforts at getting it working again, but that wouldn’t be any fun for anyone (for me to write, nor for you to read). I’ll say only that I spent at least 20 hours on it during and since the haul out, and it’s still not working. Oh, well.
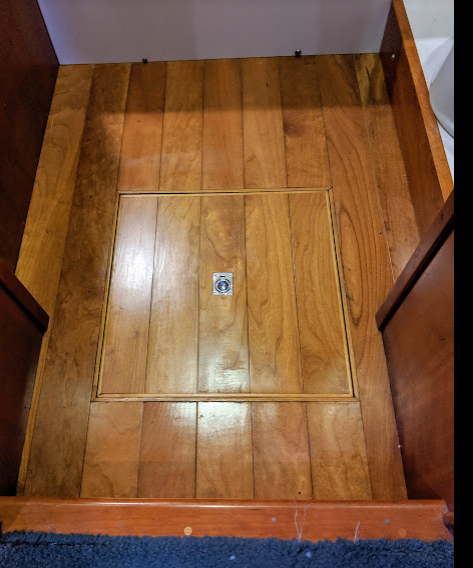
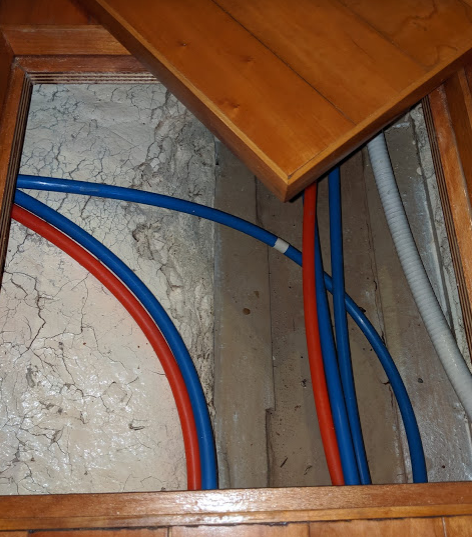
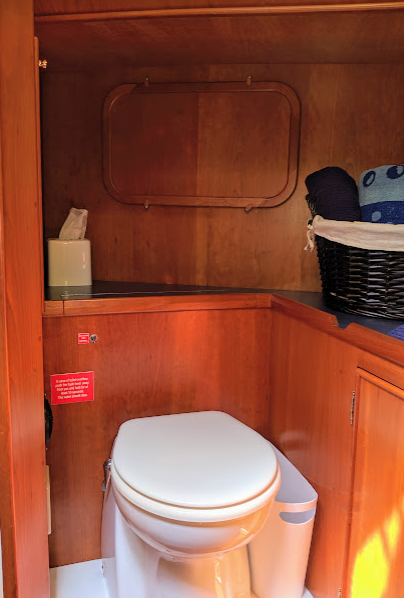
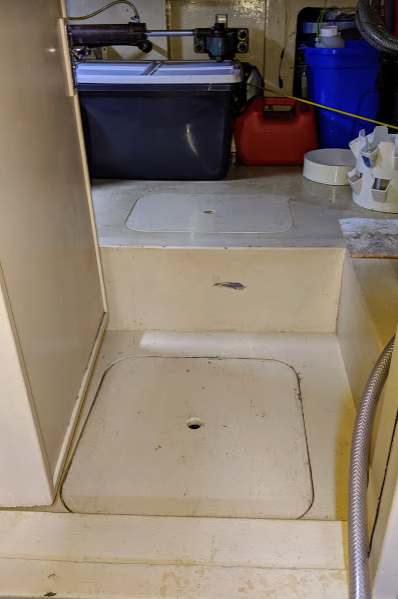
Add Hatch to Master Head (Bathroom) Floor
The aforementioned forward bilge area actually exends forward of where the bilge pumps are located about another four feet. But there was no way to access those four feet, unless you were a very large octopus with very long arms that you could squeeze through a very small gap. I’m not an octopus, but I badly wanted to be able to access that last frontier of the forward bilge, so that I can periodically inspect it, and specifically so that I could hopefully find the source of a small fresh water leak that has plagued me almost since we bought the boat. Chris from Custom Fit and his reciprocating saw, and some nice woodwork, put a hatch in the floor of the master head (bathroom) that looks like it’s always been there, and that opens directly into the far forward bilge. Yay! (And it’s now completely clean, which it hasn’t been in many, many years.)
Replace Killer’s Cradle with One That I Don’t Hate With Every Fiber of My Being
Longtime readers may recall that, at our last haul out, just before we left Florida on the Big Adventure, we bought Killer. And that Killer needed to have a new cradle made for him to sit in on the upper deck. And that a certain vendor who shall remain nameless to protect his (or not: Richard Ramsay at Ramsay Marine in Riviera Beach, FL) went against my wishes and constructed a monstrosity of a cradle, from stainless steel tubing instead of aluminum, that has never, ever cradled Killer properly, not once, since it was installed. A cradle that I have cursed (along with Mr. Ramsay, who convinced me that he was doing the right thing by totally changing the design that we had agreed upon) every single time we have put Killer onto it. A cradle that easily makes the Top Five List of Things I Hate Most in the World. A cradle that, mercifully, is now on a scrap heap somewhere in Sint Maarten, because it was replaced by a cradle that is exactly what I wanted Mr. Ramsay to make. At FIFTEEN PERCENT – 1/7th – of the price!!! Thank you, Ral Marine!!!! (Seriously – if you are ever in Sint Maarten and need metal fabrication, call Ral – he’s one of the best vendors we’ve had the pleasure of working with in five years of boat ownership.)
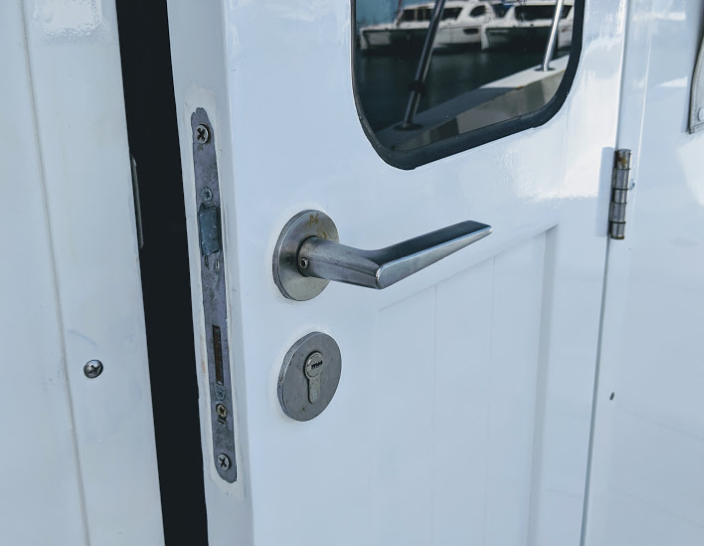
Replace Rusted Locks on Pilothouse Doors and Re-finished Them
The locks and latches on both side doors had become very rusty inside, so much so that one of them couldn’t be opened, and the other one couldn’t be locked. I had looked online for replacement mechanisms some time ago without success. While we were hauled out, Shawn, a local boat painter, came by looking for work, and asking specifically if we wanted the pilothouse doors re-varnished. We told him the only way we could do that was if we could get the locks / latches open and replaced. He has a friend who is a locksmith, and within an hour, she was onboard, and she got the doors open, the mechanisms removed, and they removed the doors themselves. Shawn re-varnished the inside of the doors, but instead of re-varnishing the outside, we had him paint them white – paint is much easier to maintain than varnish on exterior wood. He returned the doors, and although it took several phone calls to his friend, the new lock/latch mechanisms were installed, and now we have functional pilothouse doors again. Yay!
Clean And Repaint Far Aft Bilge Area
Aft of the area where the aft bilge pumps are, the bilge continues almost to the back of the boat. Due to a problem we discovered before we even bought the boat, which later became the subject of my first “fixing the boat” post (“Rust Never Sleeps”), water had been allowed to sit in two sections of this aft bilge area for prolonged periods of time, and had caused the paint to bubble up and rust to begin forming. I had attempted to clean up this rust at the time, but never got around to getting it properly cleaned up and painted. Fran got to do that during this haul out. It might not sound too bad, but consider this – to get to the rust, you’re on your hands and knees on a very uneven surface, working through a hatch in the floor, upside down, under and behind a bunch of hydraulic hoses. You have to get ALL of the rust, not just most of it. That means using a drill with a wire wheel, and a wire brush, and a chipping hammer, and all kinds of other implements of destruction, for hours on end. Then you treat it with a rust converter, because in spite of your efforts, you can’t get every bit of rust. Finally, you apply two coats of epoxy paint. I believe Fran would say that this was, without question, her worst two days of the haul out. But now it’s clean and rust-free! Yay!
Remove Killer’s Rubrail and Replace it with Fire Hose
“Dinghy Dock” – sounds like a pleasant little place for all the dinghies to hang out while their owners are onshore. But it’s a brutal place! Boats banging into each other, banging against the dock, getting caught under the dock… after eighteen months of that, Killer’s original rubrail was cracked and literally falling off. So while we were in the yard, we removed it by drilling out about fifty rivets, then filled them all with epoxy to keep the water out. We visited both fire stations on the island, the French one in St. Martin, and the Dutch one in Sint Maarten. Fire departments use their hose for only a certain amount of time, and then they replace it, and they don’t have much use for the old hose. Thankfully, they seem to always keep it around, nicely rolled up and out of the way. If you ask for it, they’ll give it to you. The hose we got from the French was what I always thought of as fire hose – a canvas-like wrapper around a rubber hose. We thought that would make pretty decent rubrail for Killer, but I didn’t get quite enough, and when I went back to ask for more, they told me they didn’t have any more. (I speak NO French, so maybe what they told me was “Go away, you silly English pig dog!” Regardless, I didn’t get any more hose from them.) The Dutch firefighters, however, are SERIOUS about their fire hose! It’s not at all like the old style canvas-wrapped – it’s much bigger diameter, and it’s made of some tough rubber-like material that seems like it would stop bullets. And I made sure to get a LOT of it!
It took us two or three days to do it, but now Killer is wrapped with Dutch fire hose, and he can hang out at any dinghy dock with impunity. (And he looks pretty badass, too!)
Two Coats of Bottom Paint
When a boat sits in the water for prolonged periods, it eventually attracts lots and lots of sea life – barnacles are the worst, but there are all kinds of organic stuff that wants to make a home on the hull. To slow that down a bit, you put “bottom paint”, a.k.a “anti-fouling paint”, on the hull from the waterline down. Different types of bottom paint do their job in different ways, but the bottom line (pun intended) is that you need to reapply it every year or two. It had been eighteen months since our last haul out, so it was time. This, in fact, is the main reason for hauling Smartini in the first place. Most of the other projects we completed during the haul out could have been done in the water – but not bottom paint. In the past, Fran and I have done the bottom painting, and it’s not fun. It takes us about five hours to apply one coat, and it’s hard work. This yard, however, doesn’t allow anyone other than their employees to do bottom work, so their guys did it. Yay! Killer got a couple of coats, too.
Inspect Fuel Tanks
Smartini has four fuel tanks – two 400 gallon tanks and two 100 gallon tanks. (Yes, that’s 1,000 gallons in total. Fortunately, 1,000 gallons will get us about 1,500 nautical miles, which is a little more than the straight line distance from Satellite Beach to Grenada. So we don’t have to fill those tanks too often.) The tanks are made of steel – in fact, the outer wall of each tank is actually the hull of the boat. As far as we know, they haven’t been cleaned since the boat was built in 2002, and we thought it was time to at least have them inspected. Unfortunately, it’s damned near impossible to get to the tops of the tanks where the access holes are. All kinds of other boat equipment was installed after the tanks were plumbed. But we figured out how to get access to one of the big ones, and had Deon and Crew tackle it. First, I moved all the fuel from that tank into the other three (Smartini has a built-in pump and valves for moving fuel around, so this was easy), leaving only about eight gallons in the bottom. Each tank has a drain valve, so they drained the last eight gallons into some five gallon buckets, and thankfully, the fuel was remarkably clean. No water at all, which is often a problem in large fuel tanks. A little rust, but not much. Old diesel fuel can solidify into a hard black substance called asphaltine, but there was virtually none. So far, so good. Deon had his guys pump that eight gallons back into the top under pressure, hoping to dislodge any crud on the bottom and wash it to the drain valve. They did this five or six times, and to our great delight, almost no more crud came out. Finally, they pumped four gallons of clean fuel in, and drained it, and it looked really good. Deon was amazed that the tank was that clean, and said he saw no reason to repeat the process on the other three tanks. Tanks, Deon! Tanks a LOT! Saved us several hundred dollars, and now we have the peace of mind knowing that our tanks are unlikely to cause us any problems.
As a side benefit of having Deon onboard, we learned about his restaurant, The Palapa Grill, and learned how to make Fran’s new favorite cocktail from their fabulous bartender, Ludovica. It’s an old cocktail with a new twist:
Ludo’s New-fangled Old Fashion
1 shot of bourbon (we used Four Roses)
5 or 6 shakes of Angostura Bitters
1/4 shot of habanero simple syrup (Ludo’s fabulous twist)
Shake with ice, pour over fresh ice cubes, garnish with dried orange slice
At this point, we “splashed” – put the boat back in the water. The rest of the projects below were completed in the marina in the several days after that.
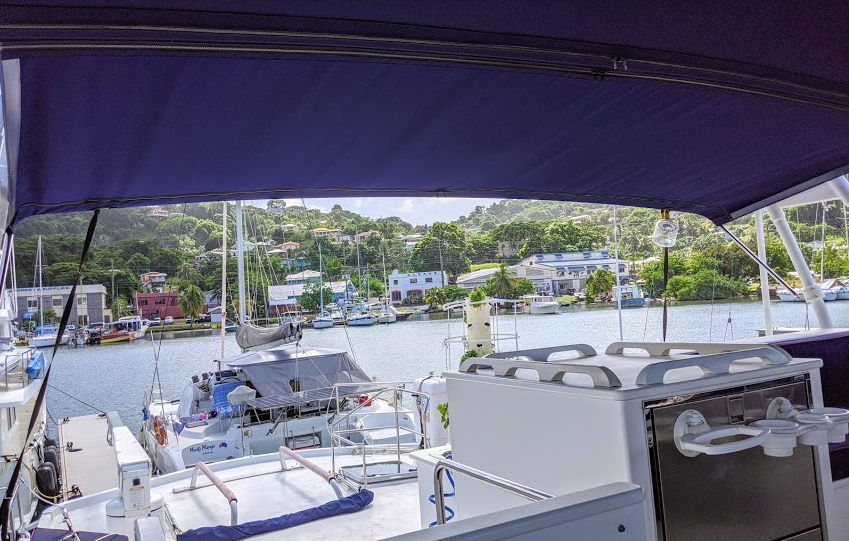
New Extension to the Canvas Top on the Flybridge
We’ve wanted to extend the canvas top almost since we bought the boat, but at least three different canvas people have looked at it and concluded that it would be too difficult. We always thought there must be a simple way to do it, and we finally found the guys to do it. Arno, Ral, and Laurent put their heads together, and in just a few minutes, they came up with a simple plan. Ral fabricated a big bow, and some clamps to attach it to the legs of the arch (where the radar, solar panels, and all the antennas are mounted). Laurent came and made a plastic template of the new piece that would connect to the trailing edge of the existing canvas (with a zipper), and to Ral’s new bow. He came back the next day with the canvas piece to make sure it was going to fit (it did), then took the existing canvas back to the shop, sewed on the new zipper, and brought it all back the same day. Now we have four more feet of shade and rain protection, and we love it! Yay!
Add Magnets to the Hatch Latches
Have you ever had some little annoying thing around the house that you let go for a long time, and then finally fix it, and wonder why the hell you didn’t do it a long time ago?. Well, this was one of those things. To get from inside the boat to the upper deck, you go up some stairs through a big hatch. The hatch is on hinges, and has two gas shocks like on the hatchback of a car, to help lift it and keep it open. It also has two latches that allow you to lock the hatch from the inside. The latches are two pieces – one piece attached to the frame, the other attached to the hatch itself, and this latter piece hangs down, so that every time you close the hatch, one or both of the latches swings into the opening, onto the top of the other piece, and prevents the hatch from closing. We’ve probably opened and closed this hatch 14,000 times since we bought the boat, and every time, we’d cuss at those damned latches. Finally, one recent day, we both looked at the problem for the first time, and in about two minutes came up with the solution. Fran glued a small magnet to the swinging part of the latch, and another small magnet to the hatch. The magnets hold the swinging part of the latch in place, completely out of the way, whether the hatch is being opened or closed. Why didn’t we do this three years ago?!?! Oh, well. (Next up – something to keep the fridge and freezer doors from swinging back and forth when they’re open. I’m guessing magnets will be involved.)
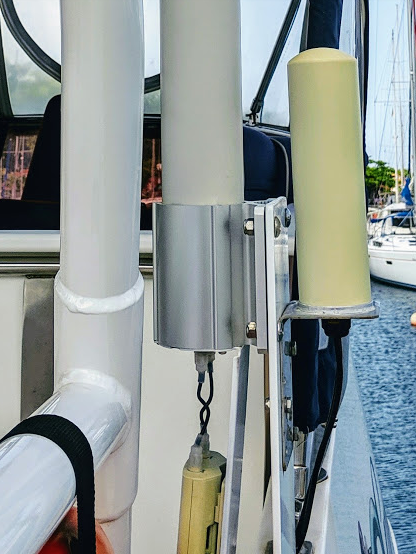
Clean and Paint the Rusty Wifi Antenna Bracket
We have wicked awesome wifi antenna (thanks, Uncle Cousin Bill!) that’s mounted on the side of the flybridge. Over time, one part of the mounting bracket lost a fair bit of paint and started to rust. I removed the antenna, disassembled the mounting bracket, wire brushed it, soaked it in rust remover, then spray painted it. Put it all back together and remounted it – good as new!
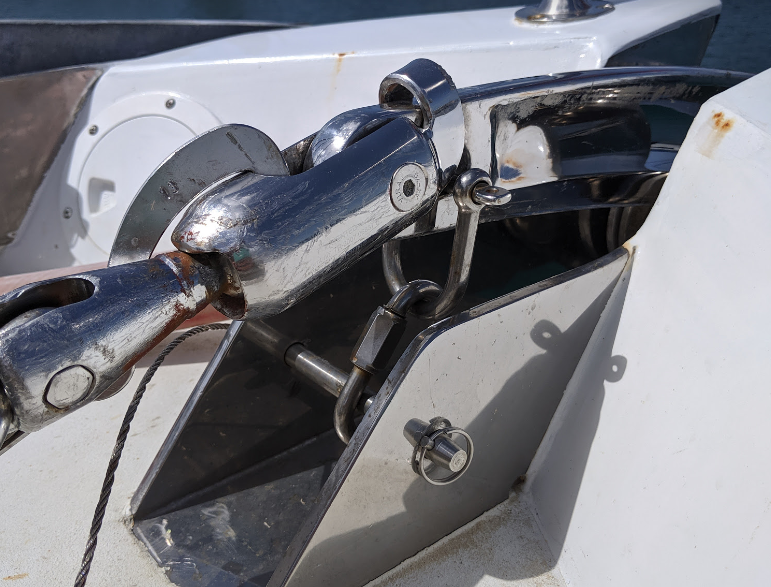
Install New Anchor Securing Mechanism
The anchor lives out on the very front of the boat, mostly hanging over the edge, sitting on something called the bow roller. It’s attached to the anchor chain with a very heavy duty swivel. If that swivel ever broke while we were underway, the anchor would fall into the water, and we’d never see it again. We love our anchor – we would hate to lose it. So we used some off-the-shelf parts, and one fabricated part, and Ral’s guy Mahindra drilled a couple of holes in the bow roller, and now, even if the swivel breaks, the anchor will stay right where it belongs. Yay!
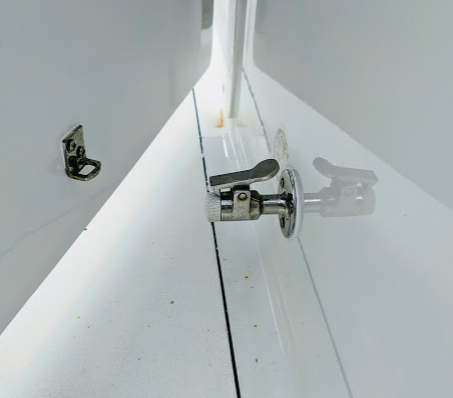
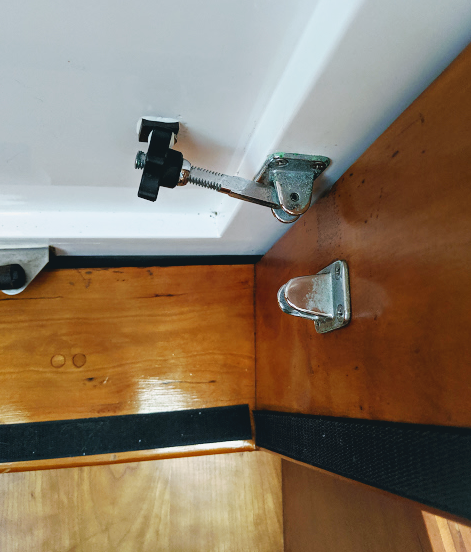
Change the Pilothouse Door “Hold Open” Latches
When we bought Smartini, each pilothouse door (the side doors) had a latching mechanism to hold them all the way open. It was a solid mechanism, but it was hard to unlatch, so I replaced both of them with two really strong magnetic latches. They worked well, but a really strong wind, or even a big roll of the boat, would be too much for the magnets and the door would slam shut with a bang and a shudder that was guaranteed to make both of us exclaim “What the hell was that?!?”. Also, the magnets had rusted rather badly. Fortunately, I kept the original mechanical latches, and I reinstalled them.
Since then, we’ve completed at least seven other small maintenance / improvement projects, but since they weren’t planned as part of the haul out, I won’t list them here. Except for one – I finally found and fixed the mysterious fresh water leak into the forward bilge that had vexed me since we bought the boat! Now that there’s a hatch into that area (described above), I could easily keep an eye on it, and as soon as there was water in it, I could think about what we’d recently done that might result in a leak. I had associated the leak with running the water maker (desalinator) for a long time, but I had pretty much convinced myself that wasn’t it. But it had never occurred to me that, when we run the watermaker, we’re typically doing it only every two or three days. We have to run the generator to do it. When we run the generator, the water heater also runs. When the water heater hasn’t been run for more than a few days, and then it runs, the water expands in the tank and some of it comes out through a pressure relief valve (I had no idea!). There’s a hose on that valve that drains the water into the bottom of the compartment where the water heater is, and then it slowly finds its way out of that compartment and into – you got it! – the forward bilge. (In my defense, the water heater is in a compartment that is really hard to get to, and I almost never look in there.) I’m sure Sherlock Holmes would have deduced the problem a long time ago, but I never made the connection. Now I have – literally: I replaced that drain hose with a longer one, and connected it to an existing drain hose under the floorboards, so now when the water heater relieves itself, it goes to the same pump that pumps all the rest of our “gray water” (sinks, showers, air conditioning condensate drain pans) overboard. Yay! Yay! Yay!
In case you’re thinking that we must have bought a real piece of shit boat, to need all this work all the time, think back to my opening sentence, about cruising being “fixing your boat in exotic places”. Talk to anyone who lives on their boat, and you’ll find they have a list very similar to this. Maybe the next post I write will be “How to Make Coffee on a Boat”, comparing the process to doing it in a house, and illustrating how many things you take for granted in a house (electricity, clean water, plumbing) that you can’t take for granted on a boat. Then maybe you’ll understand!
But for now, I’m just going to enjoy the fact that we’re temporarily living in Grenada, one of the most beautiful places we’ve ever been. I don’t mind doing a little boat maintenance here. It’s pretty exotic.
I’m with you and your comment that probably most readers never got past “work, work, work” but I, for one, LOVED the article. As a future live aboard owner, I live to hear the Horrible stuff, work stuff, maintenance stuff, and all of the “fun things you have to do to stay afloat”!!!! Great article. All part of repairing stuff in exotic places. I look forward to my days!!!!! Y’all take care.
Mike, don’t you know by now that I write these maintenance articles for you? I’m trying to warn you!!! 🙂
Hi, I discovered on Signal K – DIY Sensors with Signal K Part 2 – The Hardware. Impatiently looking for a sequel, will it? I found the contact by chance on this Site and now I would like to read it. I’m sorry to weed the thread. Vitek
Vitek,
I just wrote those posts. Someone else decides when to publish them. The Hardware post is written and ready to publish. Maybe you should post a comment there to ask them to publish it. Or email me, and the next time I’m at my computer (I’m on my phone now), I’ll send it to you.
Thanks for the interest!
Sounds kinda fun to me. Clearly, I need a boat.